What You Need to Know About Siding Repair in Calgary

Siding repair involves fixing or restoring damaged exterior cladding on buildings, such as replacing broken panels, addressing weather-related issues, and maintaining the overall integrity and appearance of the structure.Neglecting siding repairs can lead to severe consequences such as moisture damage, energy loss, and decreased property value. Properly maintaining and repairing siding in Calgary ensures the protection of homes and buildings from the harsh weather conditions unique to the region. It is crucial to address any siding issues promptly to prevent further damage and maintain the overall quality of the property.

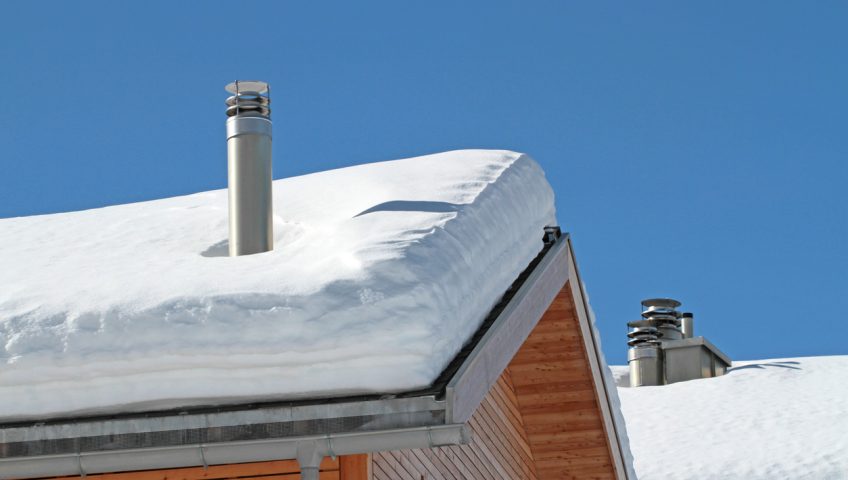
In Calgary, siding repair plays a vital role in preserving the integrity of residential and commercial buildings. The extreme temperatures, frequent freeze-thaw cycles, and unpredictable weather conditions in the area make it essential to uphold the condition of the siding. Timely repairs not only prevent water infiltration and subsequent mold growth but also enhance the overall aesthetic appeal of the property. By addressing siding issues promptly, owners can avoid more extensive and expensive repairs in the future.

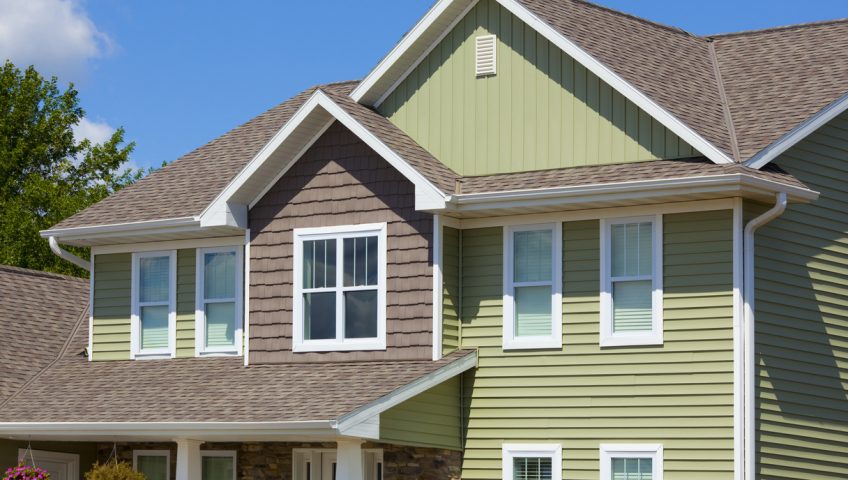
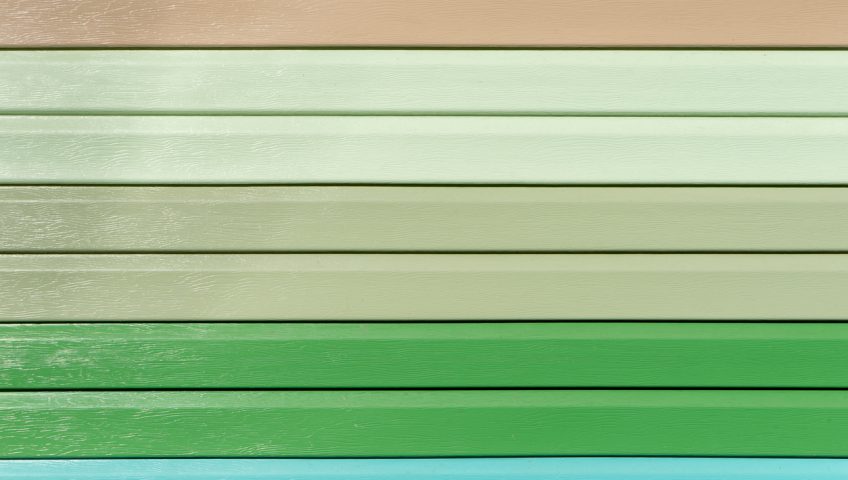
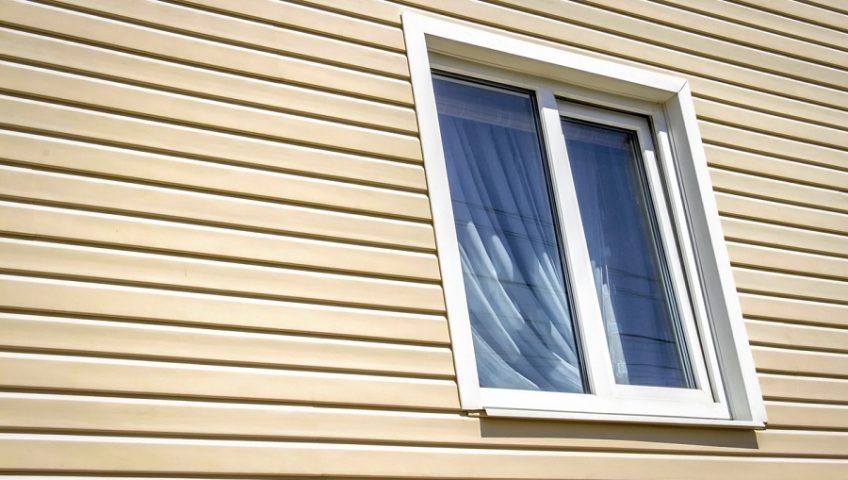
Calgary Siding repair involves unique details that deserve attention. The selection of suitable materials according to the specific climate conditions is crucial. For instance, vinyl siding is a popular choice due to its durability and resistance to extreme temperatures. On the other hand, fiber cement siding offers excellent fire resistance and stability. Additionally, regular inspections and maintenance should be carried out to identify any signs of damage or wear and tear. Professional assistance should be sought for complex repairs and replacements.

Pro Tip: It is recommended to consult with a professional siding repair specialist in Calgary to assess the condition of your property’s siding and provide tailored recommendations for maintenance and repairs. This ensures the longevity and value of your investment.

Common Signs that Your Siding Needs Repair

Common Indicators of Damaged Siding

The signs suggesting that your siding requires repairs include:

  • Cracks: Keep an eye out for cracks on your siding surface, as they can allow moisture and pests to enter your home.
  • Peeling Paint: When paint begins to peel off, it may indicate underlying problems with your siding, such as moisture damage.
  • Warped or Buckling Siding: If your siding appears warped, buckled, or uneven, it may be a sign of moisture infiltration or hidden structural issues.
  • Faded or Discolored Areas: Fading or discoloration can signal damage caused by prolonged exposure to the elements.
  • Increased Energy Bills: If you notice a sudden increase in your energy bills, it could be due to compromised insulation caused by damaged siding.
  • Insect or Pest Infestation: Damaged siding can provide access points for insects and pests, leading to infestations within your home.

Other Noteworthy Details

It is crucial to address these signs promptly to prevent further damage and maintain the visual appeal and structural integrity of your home. Regularly inspect your siding for any signs of wear and tear so that you can take timely action.

Recommended Steps for Siding Repair

To rectify these issues, you can follow the following suggestions:

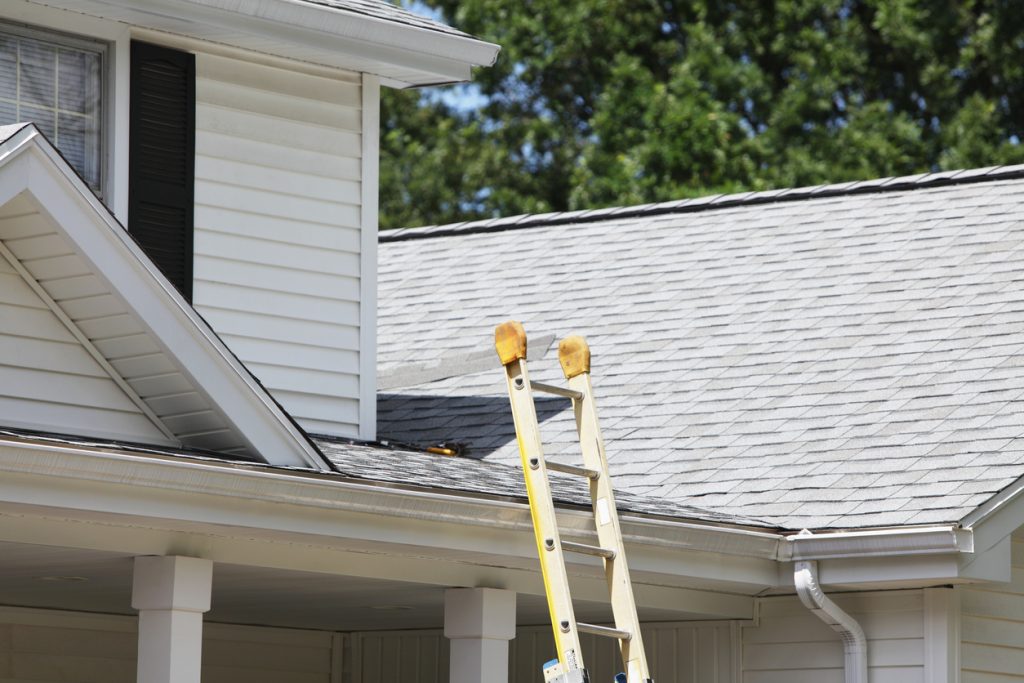
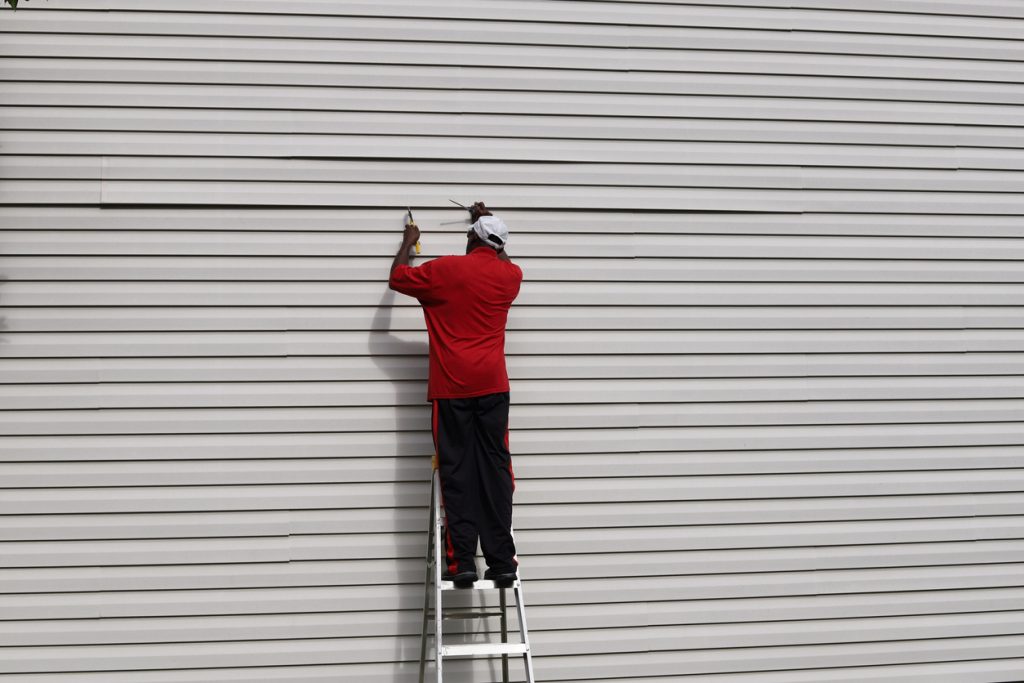
  • Repair or Replace Damaged Siding: Hire a professional to repair or replace the damaged sections of your siding to prevent further deterioration and enhance its longevity.
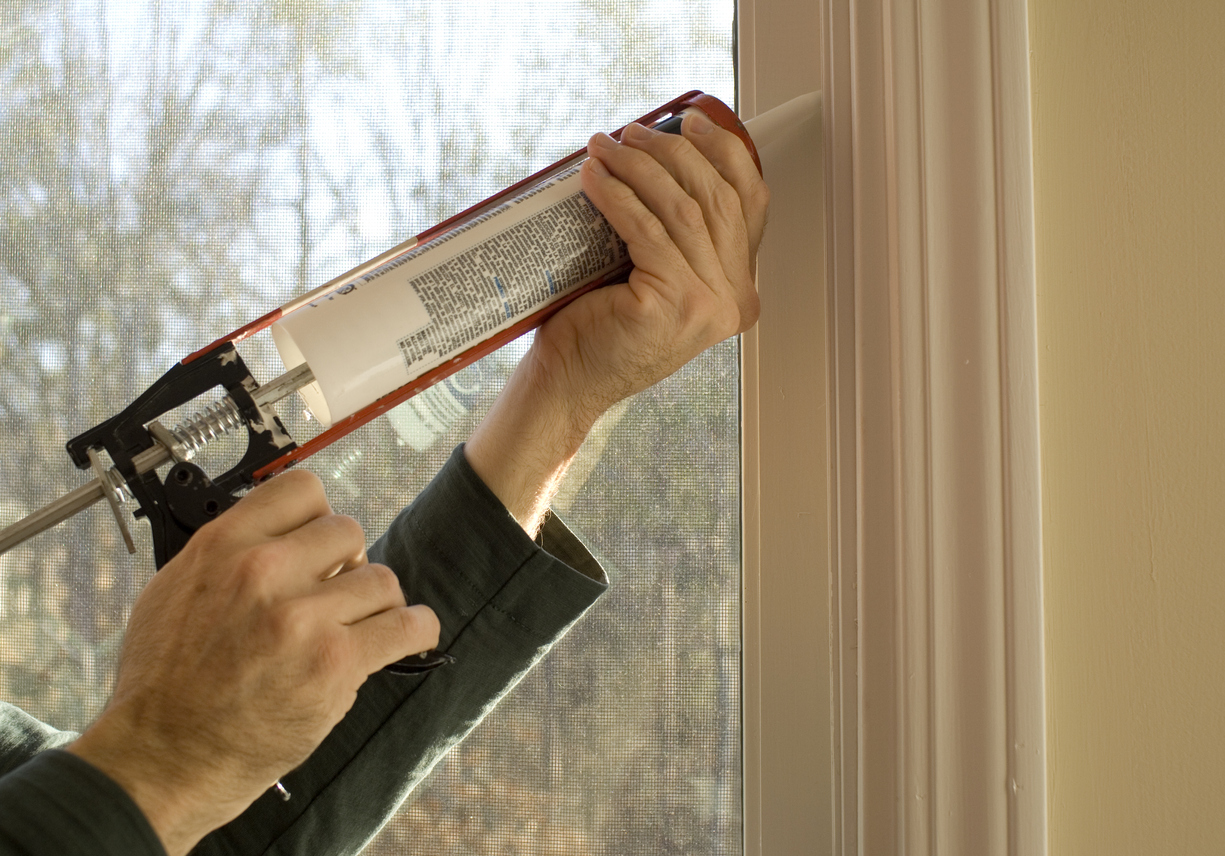
  • Seal and Caulk Gaps: Seal any gaps or cracks in your siding to prevent water infiltration and improve energy efficiency.
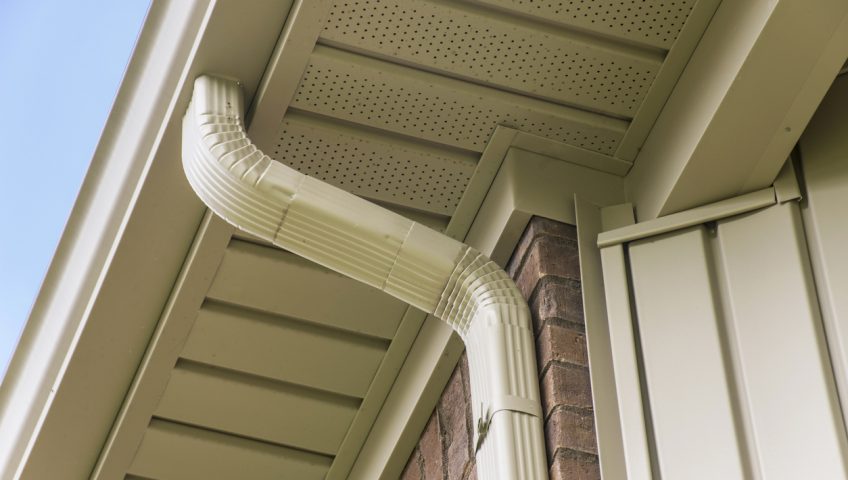
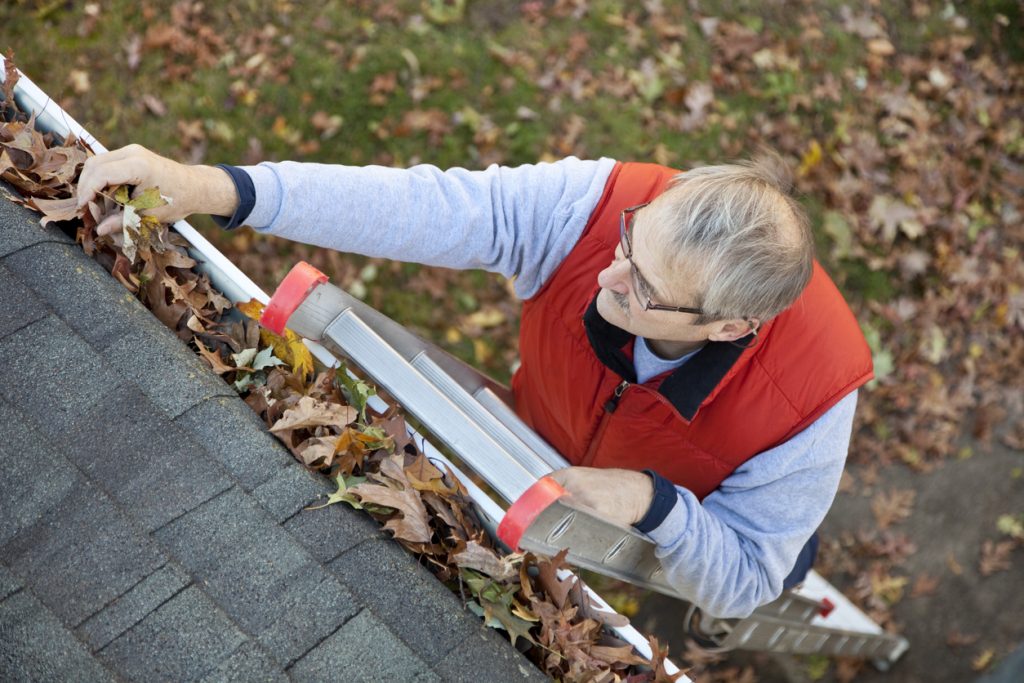
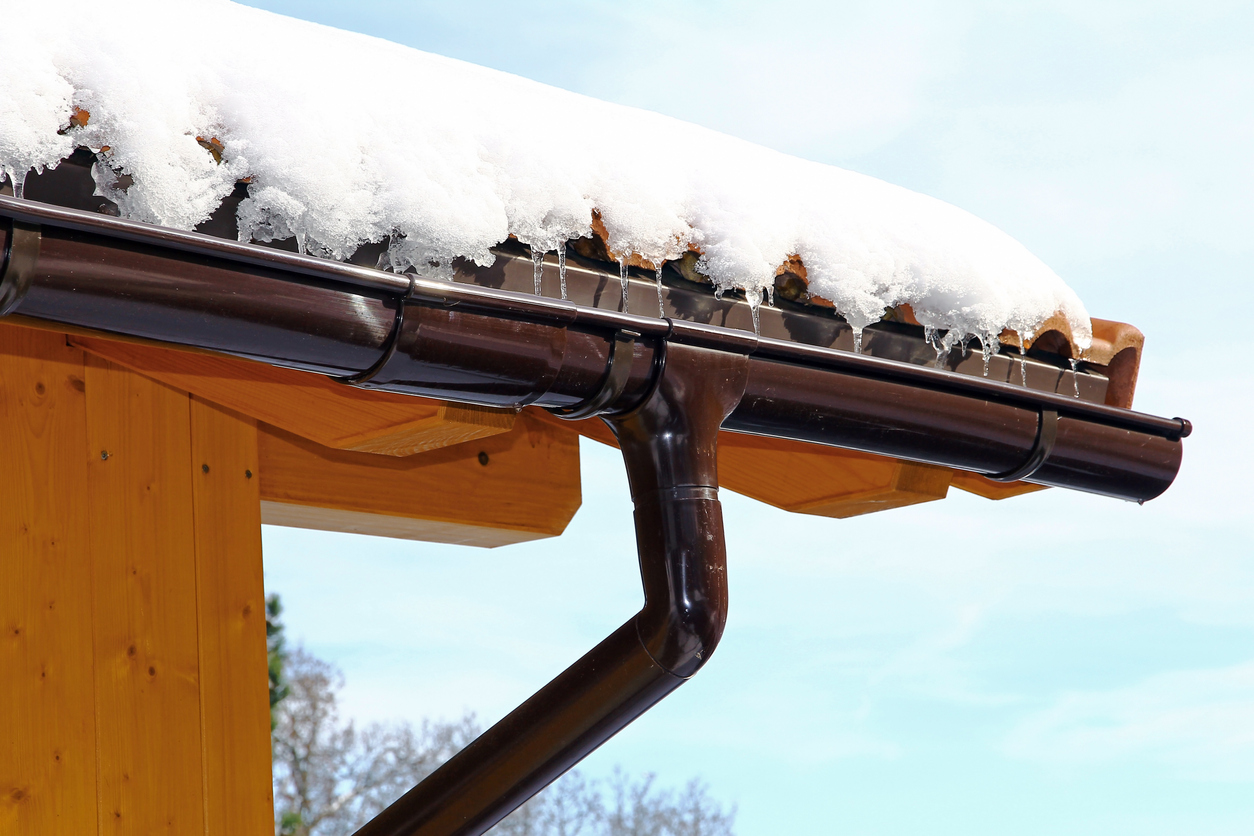
  • Maintain Proper Drainage: Ensure that your gutters and downspouts are functioning correctly to redirect water away from the siding and prevent moisture-related issues.
  • Regular Cleaning and Maintenance: Regularly clean and maintain your siding by removing dirt, debris, and mold or mildew to preserve its appearance and minimize potential damage.

By addressing these common signs of siding damage and following the necessary steps for repair, you can protect your home from further deterioration and maintain its overall integrity.

Addressing Siding Repair Promptly

Text: Siding repair in Calgary: Everything you should know

Siding repair in Calgary is a crucial aspect of home maintenance. Addressing siding repair promptly is essential to prevent further damage and maintain the aesthetics of your home. When it comes to siding repair in Calgary, it is important to understand the various aspects involved.

One important factor to consider is the type of siding material used in your home. Calgary experiences harsh weather conditions, including heavy rainfall and extreme temperatures, which can cause wear and tear on the siding. Knowing the specific material of your siding will help determine the most effective repair methods.

Additionally, it is crucial to identify the signs of siding damage. Cracks, warping, and fading are all indications that repair is needed. Ignoring these signs can lead to more severe problems, such as water infiltration, mold growth, and structural damage.

To address siding repair in Calgary effectively, it is recommended to seek professional assistance. Skilled and experienced siding contractors have the knowledge and expertise to assess the extent of the damage and provide appropriate repair solutions. They can also ensure that the repair work is done efficiently and effectively, saving you time and effort.

Addressing siding repair promptly is like hiring a therapist for your house – because sometimes even walls need a good listen.

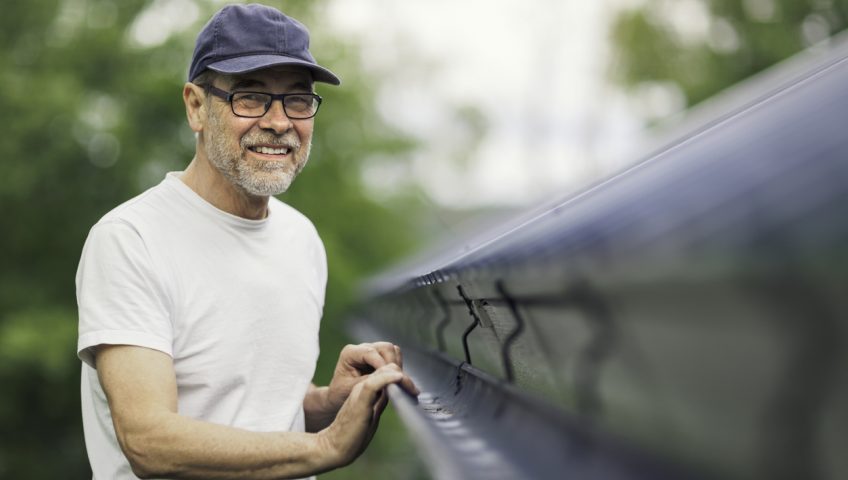
Engaging Siding Experts for Repairs

Engaging Siding Professionals for Repairs

When it comes to fixing your home’s siding, it is essential to enlist the help of skilled and knowledgeable siding experts. These professionals possess the expertise and experience necessary to handle any repair task efficiently. By engaging siding experts for repairs, you can ensure that the job is done right the first time, saving you both time and money.

Siding experts have a deep understanding of the various siding materials available in the market and can recommend the most suitable option for your specific needs. They can assess the damage and identify the underlying causes to provide effective solutions. Additionally, these professionals have access to specialized tools and equipment that enable them to complete the repairs with precision and accuracy.

One unique advantage of engaging siding experts for repairs is their ability to offer valuable advice and guidance throughout the process. They can educate you on proper maintenance techniques and suggest preventive measures to prevent future damage. By following their recommendations, you can extend the lifespan of your siding and avoid costly repairs in the long run.

It’s important to note that the information provided in this article is sourced from “What You Need to Know About Siding Repair in Calgary.” This source is a reliable and informative reference for homeowners in Calgary seeking to understand the importance of engaging siding experts for repairs.

What You Need to Know About Siding Repair in Calgary:

  • ✅ Proper siding maintenance is essential for preserving the structural integrity of your home and avoiding costly fixes down the road.
  • ✅ Damaged siding, even if seemingly minor, can compromise your home’s curb appeal and allow moisture to seep in and cause water damage.
  • ✅ Calgary homeowners have a wide range of siding options to choose from, including vinyl siding, wood siding, cedar siding, and metal siding.
  • ✅ Even vinyl siding, known for its durability and low maintenance needs, can suffer damage over time and may require professional repair.
  • ✅ Signs that your home may need siding repair include hidden dry rot, increase in cooling and heating bills, over-painting of the home, loose or cracked siding, and subtle signs inside your home such as loose wallpaper and peeling paint. (Source: Team Research)

FAQs about What You Need To Know About Siding Repair In Calgary

Q: Why should siding repair be high on my priority list for maintaining my home’s exterior?

A: Siding repair is crucial for preserving the structural integrity of your home and avoiding costly fixes in the future. Damaged siding can compromise your home’s curb appeal and allow moisture to seep in, leading to water damage and potential issues like mold growth or structural instability.

Q: What are the consequences of delaying siding repairs?

A: Delaying siding repairs can lead to further issues, such as roof leaks, water damage, and reduced energy efficiency. It’s essential to engage in regular exterior maintenance and promptly address any siding concerns to ensure your home remains in optimal condition while enhancing its curb appeal.

Q: How can I detect hidden dry rot in my siding?

A: Dry rot, which can cause significant damage, often goes undetected as it cannot be seen by the naked eye. To detect hidden dry rot, tap on your siding with a rubber handle. If you hear a hollow noise, there’s a good chance you have dry rot. It is recommended to consult a roofing and siding expert immediately if you suspect dry rot.

Q: What are the signs of underperforming siding and insulation?

A: One of the signs of underperforming siding and insulation is a noticeable increase in cooling and heating bills. If your bills are higher than normal, inspecting your roof and attic can rule out other causes. If the issue persists, getting a siding inspection is recommended. Additionally, feeling drafts near walls and windows is another indication of underperforming siding and insulation.

Q: How can I determine if my home needs a siding replacement?

A: If you find yourself needing to repaint your home every five to six years or notice severe fading in the color of your siding, it indicates a problem with your siding. Peeling, chipping, or cracking paint are also signs that a siding replacement may be necessary, rather than just a new paint job.

Q: Why is it important to address loose or cracked siding?

A: Loose or cracked siding should be addressed sooner rather than later, regardless of the extent of the damage. Leaving damaged siding can lead to further harm, potentially causing water to seep behind the damaged pieces. It’s best to replace any broken, loose, or cracked siding to prevent further issues and maintain your home’s integrity.

Alpine Exteriors – Siding and Roofing 148 Fairview Dr SE, Calgary, AB T2H 1B2 +14032427868
Gutter on Roof

Eavestrough Replacement Cost In Calgary

If you are a homeowner in Calgary, you know the importance of having a reliable eavestrough system to protect your home from water damage caused by rain and melting snow. However, when it comes to installing eavestrough, many homeowners are left wondering about the cost. In this article, we will explore the factors that affect the cost of eavestrough installation in Calgary and provide you with an estimate of the cost. We are Also Calgary Siding experts .

What is an Eavestrough?

An eavestrough or gutter system is an essential part of your home’s exterior. It is designed to collect rainwater from the roof and direct it away from the foundation of your house. Eavestroughs help to prevent water damage to your home, such as water seepage in the basement, foundation cracks, and soil erosion. They also protect your landscaping and prevent water from pooling around the house, which can cause damage to the exterior walls.

Factors Affecting Eavestrough Installation Cost

The cost of installing eavestroughs in Calgary can vary depending on a number of factors, including:

  1. Size of Your Home

The size of your home is one of the most important factors that determine the cost of eavestrough installation. Larger homes require more eavestroughs, downspouts, and hangers, which can increase the cost of installation.

  1. Type of Eavestrough

There are different types of eavestroughs available in the market, such as aluminum, steel, copper, and vinyl. Each type has its own advantages and disadvantages, and the cost of installation varies accordingly.

Aluminum Eavestroughs

Aluminum eavestroughs are lightweight, durable, and corrosion-resistant. They are available in various colors and styles, making them a popular choice for homeowners. Aluminum eavestroughs are easy to install and maintain and are relatively affordable.

Vinyl Eavestroughs

Vinyl eavestroughs are lightweight and easy to install. They are available in different colors and styles, making them a popular choice for homeowners who want a low-maintenance option. However, vinyl eavestroughs are not as durable as aluminum eavestroughs and can crack or become brittle in extreme temperatures.

Steel Eavestroughs

Steel eavestroughs are strong and durable, making them a popular choice for homeowners who want a long-lasting option. They are available in different colors and styles and can be painted to match your home’s exterior. However, steel eavestroughs are more expensive than aluminum and vinyl eavestroughs and can rust over time.

Seamless Eavestroughs

Seamless eavestroughs are made from a single piece of material that is custom-cut to fit the exact length of your roofline. They are available in different materials, including:

Aluminum Seamless Eavestroughs

Aluminum seamless eavestroughs are lightweight, durable, and corrosion-resistant. They are custom-made to fit your home’s roofline, ensuring a perfect fit. Aluminum seamless eavestroughs are more expensive than sectional eavestroughs, but they require less maintenance and have a longer lifespan.

Copper Seamless Eavestroughs

Copper seamless eavestroughs are strong, durable, and offer a unique, elegant look to your home. They are custom-made to fit your home’s roofline and can last up to 50 years with proper maintenance. However, copper seamless eavestroughs are more expensive than other types of eavestroughs.

  1. Gutter Guards

Gutter guards are optional accessories that can be installed on your eavestroughs to prevent leaves and debris from clogging the system. The cost of gutter guards varies depending on the type and quality.

  1. Accessibility

The accessibility of your roof can also affect the cost of eavestrough installation. If your roof is hard to access, it may require more time and effort for installation, which can increase the cost.

  1. Labor Cost

The labor cost of eavestrough installation in Calgary can vary depending on the experience and expertise of the installer. It is important to hire a professional installer who has the necessary skills and equipment to complete the job correctly.

Ladder Leaning Against House Roof Gutter

Estimated Cost of Eavestrough Installation in Calgary

Based on the factors mentioned above, the cost of installing eavestroughs in Calgary can range from $5 to $15 per linear foot. This means that the cost of installing eavestroughs on a typical 2,000 square foot home can range from $1,000 to $3,000.

If you choose to install gutter guards, the cost can increase by $2 to $3 per linear foot. So, for a typical home with gutter guards, the cost can range from $2,400 to $6,000.

It is important to note that these are only estimates, and the actual cost of eavestrough installation can vary depending on your specific needs and circumstances.

Average Cost of Gutters

In general the cost of replacing eavestrough in Calgary will cost around $4 per linear foot for vinyl gutters , $6 to $7 per linear foot for aluminum gutters and $30 to $35 per linear foot for copper gutters . Seamless gutters and k style gutters are also priced differntly

Keep in mind that this is just the cost of the materials like galvanized steel gutters . You will also have to pay for the installation labour. There may also be additional costs for ripping out your current eavestrough so that the new one can be installed. If you suspect water damage is occuring due to gutter replacement being required it better to call sooner than later to avoid thousands of dollars of damage. Installation costs can vary depending on architectural style, and how many downspouts are needed. traditional style buglows (one story home) tend to be the cheapest and can use cheapest gutter materials. Professional installations of types of gutters is the key to keeping the average price on the lower side.

If you’re in need of a new eavestrough, need gutter cleaning you should also talk to different contractors to try to get the best rate possible. Just don’t forget that the company’s reputation and experience should be considered as well while you’re doing your research. We are gutter installations experts and if needed we can also provide custom gutter and custom gutter systems. We are also a top notch Calgary roofing contractor and can give you a price quote for both gutters and roofing. An excellent option is to do both at once , we have flexible payment options for large jobs

Cleaning your eavestroughs is crucial to the safety of your home. If your home needs eavestrough repair, installation or maintenance, roofing repair , roofing contractor , roofing company. Wer can also provide leaf guard, downspout installationsand a wide variety of roofing services like roof replacement,  contact the professionals at Alpine Eavestrough. We’d love to hear from you.

Phone: 403-242-7868

FAQs

  1. Do I need to install eavestroughs on my home in Calgary?

Yes, it is important to have a reliable eavestrough system to protect your home from water damage caused by rain and melting snow.

  1. What is the best type of eavestrough for my home in Calgary?

The best type of eavestrough depends on your specific needs and budget. Aluminum and vinyl eavestroughs are popular choices because they are affordable and require minimal maintenance.

  1. How long does eavestrough installation take in Calgary?

The installation time for eavestroughs can vary depending on the size of your home and the complexity of the job. On average, eavestrough installation takes around one to two days.

  1. Can I install eavestroughs myself?

While it is possible to install eavestroughs yourself, it is recommended that you hire a professional installer who has the necessary skills and equipment to complete the job correctly. Improper installation can lead to water damage and other issues.

  1. How often should I clean my eavestroughs?

It is recommended that you clean your eavestroughs at least twice a year, in the spring and fall. Regular cleaning can help prevent clogs and ensure that your eavestrough system is working properly.

Cleaning your eavestroughs is crucial to the safety of your home. If your home needs eavestrough repair, installation or maintenance, contact the professionals at Alpine Eavestrough. We’d love to hear from you.

Phone: 403-242-7868

Two men applying green paneling to a house

How Much Does It Cost To Replace Siding?

No matter the quality of siding that your home boasts, there will likely still come a time when you will need to replace it. This can be the perfect opportunity to change the outward appearance of your house and perhaps even personalize it to your tastes.

However, as with any other renovation project, it’s important to have a handle on the financials and understand how much it will cost to replace your siding.

We break down how the type of materials you choose for your Calgary siding will impact the cost of your replacement.

Determining The Cost To Replace Siding

Vinyl Siding

Vinyl is one of the most popular siding options chosen by homeowners- and for good reason too! From a simply aesthetic standpoint, vinyl siding comes in numerous colours, allowing you to customize your home. From a more practical perspective, vinyl is dependable. Designed to withstand Canadian weather and any damage thrown at it, vinyl siding is durable. Additionally, it is flexible, allowing it to adjust to any foundational shifts instead of simply cracking.

In the world of siding, vinyl is arguably the most affordable option. The average price per square foot is typically around $6, but this number can go higher or lower depending on your choices.

James Hardie Siding

This particular option is a fibre cement material, made from a mix of cement, wood pulp, and silica. James Hardie board siding – Fiber cement siding has risen in popularity over the years due to its durability. Not only is it proven to hold up against hailstorms, but it is also fire and rot resistant. As well, you can customize their appearance. They are designed to replicate the look of wood, however, you can choose the aesthetic. Hardie board can reproduce any style, from planks to shingles, while also rocking practically any colour you’d like.

Two men applying green paneling to a house

Hardie board is more resilient than vinyl, which does mean the cost will be greater. On average, James Hardie siding costs 1.5 to 2 times more than vinyl. However, that initial investment will serve you longer down the line, reducing the likelihood of needing another siding replacement in your lifetime.

Engineered Wood Siding

A more cost-effective version of traditional wood siding, engineered wood is a mix of several different kinds of wood. Its design is to mimic the appearance of wood siding while being more reliable. Engineered wood is treated to protect against rot, moisture, and insects while also being sturdy enough to face off against Canadian winters.

The cost of engineered wood siding varies, depending on the type you select. Some can be competitively priced with vinyl siding, perhaps being a dollar or two more expensive per square foot. Others, however, can get quite costly, easily being $30 per square foot and having no problem going higher.

The cost to replace your siding will greatly depend on the materials you choose for your home. Don’t hesitate to contact a siding company in Calgary for a quote, allowing you to better plan your budget and feel confident moving forward.

Cleaning your eavestroughs is crucial to the safety of your home. If your home needs eavestrough repair, installation or maintenance, contact the professionals at Alpine Eavestrough. We’d love to hear from you.

Phone: 403-242-7868

Front View of blue house with siding in the suburbs

What is Hardie Board Made Of?

When it comes time for you to replace the siding on your house, one of your primary concerns is making the most of the replacement. It’s not often a homeowner wants to pay for siding installation more often than they need to, so choosing which materials will best weather the Calgary snows and rains is an important decision to make.

Hardie board has long been an attractive option for siding. But what exactly is it?

We take a look at the composition of Hardie board and its benefits below.

Understanding Hardie Board

What is Hardie Board Made Of?

James Hardie board siding, created by James Hardie Building Products over 30 years ago, is made from a mix of cement, wood pulp, and silica. This creates a fibre cement that is more flexible and durable than most other sidings.

What are the Benefits of Hardie Board?

Fire Resistant

Thanks to the elements that make up Hardie board, this product may be the difference when a neighbouring fire encroaches your property.

Storm Resistant

Hardie board has the known ability to hold up against Alberta’s hailstorms. Its durability decreases the odds of you needing to replace your siding after a particularly nasty Calgary storm.

Side and real view of craftsman house

Appearance

Not only can you choose the colour of your Hardie board, but also the style. This product can be altered to mimic the siding option you’re interested in while also giving your home a unique wooden look.

Longevity

If Hardie board can stand up to fire and storms, it’s then safe to say that it’s able to last a good few decades. One of the most appealing features of Hardie board is that it’s long-lasting and relatively low-maintenance.

Are There Any Drawbacks to Hardie Board?

The only major downside to Hardie board is the cost. Hardie board is far heavier than the regular siding, so the labour costs will be greater when accounting for the speed at which the workers can reasonably go.

However, when you consider the amount of time that Hardie board will last on your home, you may find the initial cost a sound investment.

Contacting a siding company specializing in James Hardie siding is always a solid option when considering this siding style, as they will be able to offer advice more specific to your home.

Cleaning your eavestroughs is crucial to the safety of your home. If your home needs eavestrough repair, installation or maintenance, contact the professionals at Alpine Eavestrough. We’d love to hear from you.

Phone: 403-242-7868

Green and Brown House of Stone, Cedar, Vinyl Siding

How To Install Vinyl Siding Around Windows


Caulking window

Install Your J Molding

Vinyl siding installation around windows is a crucial step in enhancing the aesthetic appeal and functionality of your home. By properly installing vinyl siding around windows, you can ensure a durable and weather-resistant barrier that protects your home from the elements. This article provides essential guidance on how to install vinyl siding around windows, ensuring a professional and seamless finish. Discover the techniques and best practices to achieve a visually pleasing and long-lasting result.

When installing vinyl siding around windows, it is crucial to pay attention to the details to ensure a proper fit and secure installation. By following the recommended steps and techniques, you can seamlessly blend the siding with your windows, creating a cohesive and visually appealing appearance.

One key aspect to consider during vinyl siding installation around windows is the integration of J-channel and corner posts. These elements play a crucial role in achieving a professional finish and maintaining the structural integrity of the siding. Properly installing and sealing these components will ensure that your vinyl siding remains securely in place and offers excellent protection against water infiltration.

Pro Tip: Before starting the installation process, make sure to measure and trim the vinyl siding accurately to ensure a perfect fit around your windows. Taking the time to properly prepare and measure will result in a cleaner and more seamless installation.

Confirming Building Preparations

Installing vinyl siding around windows requires confirming building preparations. This involves assessing the readiness of the building before the installation process. Here is a step-by-step guide to confirming building preparations:

  1. Inspect the window frame: Check for any damage or rotting in the window frame. Repair or replace any damaged sections before installing the vinyl siding.
  2. Measure the window openings: Accurately measure the dimensions of each window opening. This will ensure that you cut the vinyl siding panels to the correct size for a perfect fit.
  3. Check for level and plumb: Ensure that the window openings are level and plumb. Use a level to check both horizontally and vertically. Adjust the window frame if necessary to ensure a proper fit of the vinyl siding.
  4. Remove any obstacles: Clear the area around the windows of any obstacles, such as plants or debris, which could hinder the installation process. This will make it easier to work and ensure a clean finish.
  5. Apply weather-resistant barrier: Install a weather-resistant barrier around the windows to provide added protection against moisture. This barrier acts as an extra layer of defense and helps prevent water infiltration.

In addition to these steps, it is important to note that proper building preparations ensure a smooth and successful vinyl siding installation. By confirming that the window frames are in good condition, measuring accurately, checking for level and plumb, removing obstacles, and applying a weather-resistant barrier, you create a solid foundation for the installation process.

To further enhance the installation, here are some suggestions:

  • Use quality materials: Invest in high-quality vinyl siding and weather-resistant barrier materials. This will ensure durability and longevity.
  • Follow manufacturer guidelines: Adhere to the manufacturer’s instructions and recommendations throughout the installation process. This will help you achieve the best results and avoid any potential issues.
  • Seek professional help if needed: If you are unsure about any aspect of the installation process, it is advisable to seek assistance from a professional contractor. They have the expertise and experience to handle the job effectively.

By following these suggestions and confirming the building preparations, you can ensure a successful vinyl siding installation around your windows.

Installing Bottom J-Channel

Installing Bottom J-Channel: Step-by-Step Guide

  1. Prepare the area around the windows
    • Remove any existing siding and trim around the windows to expose the bare wall.
    • Ensure that the wall surface is clean and free from any debris or obstructions.
  2. Measure and cut the J-channel pieces
    • Take precise measurements of the sides and bottom of the window.
    • Using those measurements, cut the J-channel pieces to fit around the window, leaving a 1/4-inch gap for expansion.
  3. Attach the J-channel to the wall
    • Start by nailing the J-channel along the bottom of the window, aligning it with the bottom edge of the window sill.
    • Secure the J-channel to the wall using nails or screws, making sure it is level and plumb.
    • Repeat the process for the sides of the window, overlapping the J-channel pieces at the corners to create a seamless look.

Important note: Ensure that the bottom J-channel is installed properly to prevent water infiltration and ensure a secure attachment for the siding.

Did you know? According to the article “HOW TO INSTALL VINYL SIDING AROUND WINDOWS,” proper installation of the bottom J-channel is crucial for a professional-looking and long-lasting vinyl siding project.

Installing Side J-Channels

Installing Side J-Channels is a crucial step when it comes to installing vinyl siding around windows. This process ensures a seamless and professional finish to your siding project. Follow these 5 simple steps to successfully install side J-channels:

  1. Measure and cut: Begin by measuring the length of each side of the window where you will be installing the J-channel. Use a saw or tin snips to cut the J-channel to the appropriate length.
  2. Attach the bottom piece: Start by inserting the bottom piece of the J-channel under the siding, aligning it with the bottom edge of the window. Secure it in place using nails or screws, ensuring it is level and straight.
  3. Install the side pieces: Take the side pieces of the J-channel and slide them into place, making sure they fit snugly against the window frame. Use nails or screws to secure them into position, ensuring they are level and straight.
  4. Cut and install the top piece: Measure the length needed for the top piece of the J-channel and cut it to size. Insert it over the side pieces, making sure it is flush with the top edge of the window. Secure it in place with nails or screws, ensuring it is level and straight.
  5. Seal and finish: To provide added protection against moisture, seal all the joints and gaps with caulk. Once the caulk is dry, your J-channel installation is complete, and you can proceed with installing the vinyl siding around the windows.

In addition, make sure to choose J-channels that match the color and style of your vinyl siding for a cohesive look. By following these steps, you can achieve a professional and seamless installation of J-channels for your vinyl siding project.

When it comes to the history of installing side J-channels, it has been a commonly used technique for decades in the construction industry. The purpose of J-channels is to provide a neat and finished appearance to the edges of windows and ensure the siding is securely attached. The process has evolved over time, with advancements in materials and installation techniques, resulting in easier and more efficient installations. Today, installing side J-channels is a standard practice in vinyl siding installation, contributing to the overall quality and aesthetic appeal of homes and buildings.

Installing Drip Edge

  1. Measure and Cut: Measure the length of the window trim and cut the drip edge accordingly using tin snips. Ensure that the drip edge overlaps the corner trims.
  2. Position and Secure: Position the drip edge along the top edge of the window trim, making sure it extends beyond the corner trims. Use roofing nails or stainless steel screws to secure the drip edge in place.
  3. Attach to Siding: Slide the vinyl siding panels onto the drip edge, ensuring a snug fit. Make sure the siding panels overlap the drip edge and are properly locked in place.
  4. Secure the Bottom Edge: Secure the bottom edge of the siding panels by inserting the bottom part into the J-channel or by using a utility knife to score and snap the bottom edge onto the drip edge.

Remember, installing drip edge is a crucial step in protecting your windows from moisture damage.

Installing Siding Courses

  1. Measure and cut the siding: Use a tape measure to determine the length needed, then cut the vinyl siding using a utility knife.
  2. Prepare the area: Remove any existing siding or trim around the windows. Ensure that the area is clean and free of debris.
  3. Start at the bottom: Begin installing the siding courses at the bottom of the window. Align the first piece with the bottom edge of the window and secure it to the wall with nails or screws.
  4. Continue upwards: Install the subsequent siding courses, overlapping each piece. Make sure they are level and straight.
  5. Trim as needed: Trim the top piece of siding to fit around the top of the window. Use a snap-lock punch tool to create the necessary tabs for a secure fit.
  6. Complete the installation: Repeat the process for all windows, ensuring that each siding course is securely fastened and properly aligned.

Additionally, it is crucial to note the importance of using the right tools and following manufacturer instructions for a successful installation. Remember to handle the vinyl siding with care to prevent any damage during the process.

Following these steps will provide a seamless and visually appealing installation of siding courses around your windows.

Conclusion

Vinyl siding installation around windows is a crucial step in achieving an aesthetically pleasing and durable home exterior. By following the steps outlined in the reference data, you can ensure a professional and seamless finish.

  1. Take the time to carefully measure, cut, and secure the vinyl siding around each window, paying attention to all the necessary details.
  2. Additionally, consider incorporating unique finishing touches that enhance the overall appearance and functionality of your window sidings.
  3. By approaching this task with precision and care, you can achieve a polished and long-lasting result.

Don’t miss out on the opportunity to enhance your home’s curb appeal and protect it from the elements – get started on your vinyl siding installation around windows today.

Some Facts About How To Install Vinyl Siding Around Windows:

  • ✅ It is important to confirm that building paper is in place beneath the window’s nailing fin. (Source: Team Research)
  • ✅ The flashing at the bottom of the window should extend beyond the window’s corners and overlap the nailing hem of the siding course below the window. (Source: Team Research)
  • ✅ Window flashing should extend 5 inches from the sides and 2 inches from the top and bottom. (Source: Team Research)
  • ✅ J-channels and drip edges are the two types of siding trim pieces used for installing vinyl siding around windows. (Source: Team Research)
  • ✅ It is important to leave a 1/4 inch gap between siding pieces and J-channels to allow for expansion. (Source: Team Research)

FAQs about How To Install Vinyl Siding Around Windows

How do I install vinyl siding around windows?

To install vinyl siding around windows, follow these steps:

  1. Confirm that building paper is in place beneath the window’s nailing fin.
  2. Confirm that flashing at the bottom of the window extends beyond the window’s corners. It should overlap the nailing hem of the siding course below the window.
  3. Confirm that window flashing extends 5 inches from the sides and 2 inches from the top and bottom.
  4. Cut a J-channel wide enough to go across the bottom of the window frame and the J-channels on each side of the window.
  5. Position the J-channel piece so that the bottom of the “J” touches the bottom of the frame.
  6. Mark the edges of the window frame on the J-channel.
  7. Snip the bottom edges of the J-channel up to the marks to form little tabs.
  8. Cut off the tabs.
  9. Nail the bottom J-channel below the frame. All nailing should be done with roofing nails. Leave nails a bit loose to allow for expansion.
  10. Get a piece of J-channel a few inches longer than the side of the window.
  11. Mark a 45-degree angle with the carpenter’s square from the outer edge of the J-channel up to its inner edge.
  12. Snip along the 45-degree mark.
  13. Trim straight across the nailing fin of the J-channel to where the 45-degree cut meets the inner edge.
  14. Cut off extra nailing fin but leave the tab at the back of the J-channel.
  15. Set the J-channel against the window frame and on the bottom J-channel. The 45-degree cut will form a mitered joint, and the tab will slide beneath the “J” of the bottom J-channel.
  16. Mark the side J-channel at the top edge of the window frame.
  17. Trim the side J-channel at the mark and nail in place.
  18. Repeat steps 10 through 17 for the other side.
  19. Now you need a drip edge piece of trim to continue learning how to install vinyl siding around windows.
  20. Measure and cut a drip edge the width of the window plus both J-channels along the side.
  21. Set the drip edge in place and mark where the tops of the J-channels meet the drip edge.
  22. Cut tabs from the drip edge and bend them down into the J-channels.
  23. Nail drip edge over window with tabs fitted into J-channels.
  24. Cut a J-channel piece the width of the drip edge.
  25. Cut tabs in the J-channel to fit over the drip edge tabs and into the side J-channels.
  26. Nail the top J-channel into place.
  27. As you lay courses of siding, cut them to fit around the window behind the J-channel edges.
  28. Leave 1/4 edge of space between siding pieces and J-channels to allow for expansion.

Why is it important to pay attention to edges and seams when installing vinyl siding around windows?

Paying attention to edges and seams is crucial when installing vinyl siding around windows because they are potential areas where water can penetrate. Properly sealing these areas will prevent water damage and ensure a watertight installation.

What are the two types of siding trim pieces used when installing vinyl siding around windows?

The two types of siding trim pieces used when installing vinyl siding around windows are J-channels and drip edges. J-channels are used to trim the sides and bottom of the window frame, while drip edges are used to create a watertight seal over the top of the window.

What should I confirm before installing vinyl siding around windows?

Before installing vinyl siding around windows, you should confirm the following:

  • Building paper is in place beneath the window’s nailing fin.
  • Flashing at the bottom of the window extends beyond the window’s corners and overlaps the nailing hem of the siding course below the window.
  • Window flashing extends 5 inches from the sides and 2 inches from the top and bottom.

How do I create a mitered joint when installing vinyl siding around windows?

To create a mitered joint when installing vinyl siding around windows, follow these steps:

  1. Get a piece of J-channel a few inches longer than the side of the window.
  2. Mark a 45-degree angle with the carpenter’s square from the outer edge of the J-channel up to its inner edge.
  3. Snip along the 45-degree mark.
  4. Trim straight across the nailing fin of the J-channel to where the 45-degree cut meets the inner edge.
  5. Cut off extra nailing fin but leave the tab at the back of the J-channel.
  6. Set the J-channel against the window frame and on the bottom J-channel. The 45-degree cut will form a mitered joint, and the tab will slide beneath the “J” of the bottom J-channel.

What is the purpose of a drip edge when installing vinyl siding around windows?

A drip edge is used when installing vinyl siding around windows to create a watertight seal over the top of the window. It helps to channel water away from the window and prevent water from penetrating the siding and causing damage.


Cleaning your eavestroughs is crucial to the safety of your home. If your home needs eavestrough repair, installation or maintenance, contact the professionals at Alpine Eavestrough. We’d love to hear from you.


Phone: 403-242-7868


Multicolored vinyl siding with simulated wood texture. Plastic wall covering for exterior decoration of house. Abstract background for your design

The Best Vinyl Siding on the Market

The path to finding the best vinyl siding on the market is not a straightforward one. Indeed, there are many top brands that compete on relatively equal footing for the title. Plus, the criteria for what constitutes “best” in terms of siding is varied and immeasurable. Therefore, you need not look for the best vinyl siding, but rather the top contenders.

Many siding companies in Calgary and elsewhere are proud of the materials they produce and stand behind their outstanding quality, but we will only look at three of them today. These companies are James Hardie, Alcoa and CertainTeed. Each one of these magnificent manufacturers provides something unique and valuable with their particular brand of siding, and they all deserve a portion of your attention.

Here Are Three Excellent Siding Companies, Calgary!

James Hardie

Our first siding company is James Hardie board siding . They produce a fibre cement siding that mimics traditional vinyl siding’s look and feel, but with a more natural look. Plus, the material difference allows them to offer exceptional variety in colour, which is fantastic for people looking to find a specific colour.

However, James Hardie also provides other benefits. For example, the fibre cement is more durable than vinyl, making it easier to clean with pressure washing equipment and heavier-duty alternatives to handwashing. As well, many people celebrate the material as an excellent replacement for cedar boards because of the similarities in texture and colour.

Alcoa

Alcoa is a business with a very long history. They began in 1888 and continue to provide exceptional quality through stylish, colourful product offerings. However, it is the environmental considerations of this company that make them a contender for the best vinyl siding on the market.

Firstly, all of their products are recycled material, which dramatically reduces their environmental impact. Additionally, they engineer energy-efficiency into all of their siding materials. This method is a boon for the homeowner and builder alike. Overall, Alcoa’s classic architectural look makes them a healthy all-around choice for siding companies in Calgary

CertainTeed

The final company on our list is CertainTeed. They are well known for their unique shapes, such as their half round cedar shingling. Plus, they also have an environmentally-conscious manufacturing approach, which can be seen in their new solar roofing tiles and National Green Building Standards (NGBS) approval. 

However, the benefits do not end there for CertainTeed. They differentiate themselves from the competition with affordable pricing. Although that means you may end up getting what you pay for in some circumstances, they are a great choice for building contractors throughout the country.  

An African-American man on a ladder and fixing vinyl siding on a house
Alpine Exteriors – Siding and Roofing 148 Fairview Dr SE, Calgary, AB T2H 1B2 +14032427868

Cleaning your eavestroughs is crucial to the safety of your home. If your home needs eavestrough repair, installation or maintenance, contact the professionals at Alpine Eavestrough. We’d love to hear from you.

Phone: 403-242-7868

Alpine Exteriors – Siding and Roofing 148 Fairview Dr SE, Calgary, AB T2H 1B2 +14032427868
Maintenance on the roof

How to Clean Your Eavestrough

Eavestroughs in Calgary are an essential part of home construction. They prevent the drainage of water and snowmelt around the perimeter of the building, which has cumulatively disastrous effects. However, there is a significant downside to this fantastic modern innovation.

Indeed, the downside of eavestroughs in Calgary is cleaning them. However, you don’t have to make the process more painful or unpleasant than necessary. Instead, consider using our guide below to make it simple, straightforward, and long-lasting. 

The first step in cleaning your Calgary eavestroughs is gathering the materials. For this project, you will need the following:

  • Bucket
  • Biodegradable bag
  • Ladder
  • Gloves
  • Spade/ scoop (optional)

The Calgary Eavestrough Cleaning Process

  1. Preparing Your Ladder

The most critical part of cleaning your eavestroughs is setting up your ladder safely. Many injuries occur each year because of improper ladder safety techniques. For instance, between 2016 to 2018, Alberta had an average of 5,907 falls to a lower level with resulting injuries.

Therefore, when preparing your ladder, keep a few key tips in mind. First, always tie off your ladder to a sturdy object on the building. Secondly, if you are using an A-frame ladder, ensure its full extension and the secondary supports are locked in place. Or, if you are using an extension ladder, ensure the sliding locks are in place. Additionally, for extension ladders, you must place the bottom of the ladder four metres out from the building for every one metre of vertical distance.

Man up ladder cleaning leafs out of gutter on house

  1. Cleaning Your Eavestroughs

Again, when cleaning your eavestroughs, remember the crucial importance of ladder safety. Gather the debris and detritus into your bucket, lined with your biodegradable bag. But, don’t overextend your reach past the confines of your ladder. Remember: 3 points of contact. This rule-of-thumb states that you should always have 3 limbs touching your ladder at any given time—for example, two legs and one arm. 

After you clean a section of all the debris, descend your ladder and set it up in a new position. Repeat this process until you have completed a circuit around your home. Also, pay extra attention to the downspout connections. As the main travel area, they are the most prone to blockage and the most important to keep clear.

  1. Disposing of the Waste

Finally, once you finish cleaning the eavestroughs around your home, you need to dispose of the waste. If you have been using a biodegradable bag, simply seal it and add it to your compost bin for regular collection. Otherwise, empty the organic waste into your compost and clean out your holding container. 

Clean Your Calgary Eavestroughs Today!

Now you know the method and steps necessary to get your eavestroughs looking great and functioning properly. However, if learning about this process has made you disinterested in actually performing the work, that is no problem. Give us a call, and our friendly, professional staff will make the visit and complete the work for you. 

Cleaning your eavestroughs is crucial to the safety of your home. If your home needs eavestrough repair, installation or maintenance, contact the professionals at Alpine Eavestrough. We’d love to hear from you.

Phone: 403-242-7868

calgary-roofing-company

How To Prepare Your Roof For Winter Time

As you head deeper into winter, it’s important that you take the proper measures to protect your roof. The winter season can do a lot of damage to your roof if you’re not prepared. Here are some steps to walk through to ensure that your roof can withstand the winter conditions without any issues.

  1. Prepare Your Eavestrough
    The first thing you want to do is to maintain your eavestrough. Start by removing the debris and any buildup that may be clogging up the system. It’s also smart to get a filter for your eavestrough in Calgary. This will prevent large chunks of ice from clogging everything up and freezing parts of the gutter. If you need help with eavestrough installation or repairs, don’t hesitate to rely on a professional Calgary roofing company.
  1. Insulate and Ventilate Your Attic
    Did you know that excess heat and moisture in your attic can erode your roof? You want to insulate your attic from the heat coming in during the day. This raises the temperature in the air and causes the heat to rise. This results in snow melting and forming ice dams. A lack of ventilation can cause the hot air condensation to cause moisture damage to your roof from the inside. A professional Calgary roofing company can help you resolve these potential attic issues.

eavestrough-calgary

  1. Get Your Roof Inspected
    There are numerous things on your roof that can get worse during the winter. That’s why it’s a smart idea to get an inspection done. You want to look for loose shingles, cracked flashings, loose seams, and any other potential problems. Any repairs should be taken care of right away. The constant temperature fluctuations expand and contract parts of your roof, making it worse if you don’t fix the issues.
  1. Get Rid of Troublesome Branches
    The trees near your roof can cause a lot of problems. The branches can clog up your eavestrough in Calgary. They also tend to carry a lot of snow. The accumulated snow can fall on to your roof and add weight which can stress your roof. Sometimes the debris from nearby trees will mix with the snow and freeze during nighttime. This can wear away your roof, so you want to always clear out your roof along with the snow on a regular basis.

These are some of the things you can do to protect your roof during the winter. Putting these tips into actions will help you extend the life of your roof.

Cleaning your eavestroughs is crucial to the safety of your home. If your home needs eavestrough repair, installation or maintenance, contact the professionals at Alpine Eavestrough. We’d love to hear from you.

Phone:  403-242-7868

Vinyl Siding Calgary

When Should I Replace My Vinyl Siding? 6 Signs it Might Be Time

The siding on your home is something you see all the time, but probably rarely think about. Giving occasional thought to your siding, however, is a good idea. Just like the rest of your home, eventually it will wear out; discovering signs of wear and taking action before it starts leaking can help you avoid further damage. Watch for these signs that it’s time to replace vinyl siding in Calgary.

Read more

Roofing Company in Calgary

Why Summer Is A Good Time To Hire A Roofing Company In Calgary

Keeping your roof in good condition can help you avoid leaks and costly repairs. Don’t wait for the roof to fall down around your head; be proactive by scheduling regular maintenance with a roofing company and seeking repairs promptly if you notice roof damage or worn areas. Summer is a great time to hire a roofing company in Calgary; here’s why.

Read more