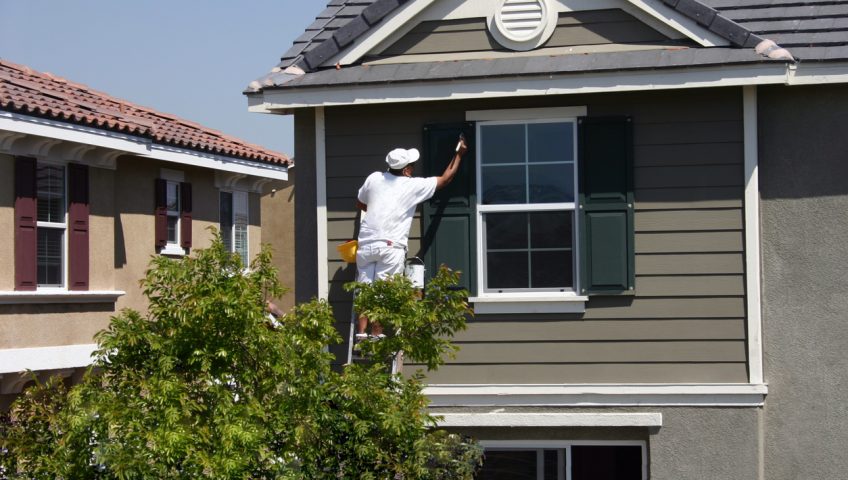
Vinyl siding installation tips refer to a set of practical guidelines and recommendations aimed at ensuring a successful and efficient process of affixing vinyl siding to the exterior of a building. These tips encompass various aspects, such as preparation of the installation area, proper techniques for attaching and aligning the siding panels, managing corners and seams, selecting appropriate tools and equipment, and addressing potential challenges that may arise during the installation. Following these tips can help achieve a visually appealing, durable, and weather-resistant vinyl siding installation.
To start the process of vinyl siding installation, it is essential to gather all the required tools and materials. This involves acquiring the necessary items that will be used throughout the installation process. Here is a
- 6-step guide for obtaining the necessary tools and materials:
- Identify the specific type and quantity of vinyl siding panels needed for the project.
- Determine the appropriate color and style of siding that complements the overall aesthetic of your home.
- Purchase starter strips and corner posts, which act as foundational elements for properly installing the siding.
- Ensure you have all the essential tools such as a tape measure, level, utility knife, saw, drill, hammer, and caulking gun.
- Obtain nails or screws specifically designed for vinyl siding installation, as they are essential for securely attaching the panels to the wall.
- Don’t forget to buy any additional accessories or trim pieces that may be required to complete the installation.
It is important to note that attention should also be given to unique details during this process in order to ensure a successful installation. Every aspect should be carefully considered and any doubts or questions regarding specific tools or materials should be addressed before starting. With these steps in mind, you can confidently acquire all the necessary tools and materials for your vinyl siding installation project. By doing so, you’ll save time and avoid potential setbacks along the way. Take action now and embark on your journey towards achieving a beautifully transformed exterior for your home! Finding cracks in the wall is like discovering hidden treasure, except the only thing you’ll find is disappointment and more work.
Checking the condition of the wall and surface preparation
The evaluation of the wall’s condition and the necessary preparations for its surface are key factors in ensuring a successful vinyl siding installation. This involves a thorough examination of the wall’s stability and overall structure, as well as the proper cleaning and priming of the surface before proceeding with the installation process.
- Assess the Wall Condition: Begin by inspecting the wall for any signs of damage such as cracks, holes, or rot. Address any structural issues before installing the vinyl siding.
- Clean Surface: Thoroughly clean the wall to remove dirt, debris, and any loose paint or wallpaper. This ensures a smooth surface for better adherence of the siding panels.
- Priming: Apply a primer to the wall to enhance adhesion and durability. This step is crucial in promoting long-lasting performance of the vinyl siding.
Once these steps are completed, you can proceed with confidence to install your vinyl siding, knowing that you have thoroughly checked and prepared the wall’s condition.
Taking proper care during this stage not only guarantees a professional look but also prevents future issues that may lead to costly repairs or replacements.
True History:
One example from history illustrates how neglecting to check the condition of the wall and surface preparation can result in significant problems. In a construction project in the early 20th century, workers failed to properly assess an old brick wall’s stability before installing new vinyl siding. As a result, cracks began appearing shortly after completion, leading to water leakage and subsequent damage to both interior walls and insulation. The entire siding had to be removed and reinstalled after addressing these issues—a time-consuming and costly mistake that could have been avoided with proper inspections beforehand.
Before you start planning, remember: a well-measured layout is the key to a successful siding project, unless you want your walls to look like they were put together by the world’s worst jigsaw puzzle master.
Step 1: Layout and planning
Layout and planning is an essential first step in the installation process of vinyl siding. It involves strategically designing the placement of the siding panels to ensure proper alignment and spacing on the wall surface.
- Evaluate the Wall Condition: Before starting the layout and planning, it is crucial to check the condition of the wall. Look for any damages or repairs that need to be addressed before installing the siding panels.
- Measure and Mark: Measure the dimensions of the wall to determine how much siding will be needed for installation. Use a tape measure and mark reference points on the wall to guide you during the installation process.
- Consider Obstacles: Take into account any obstacles such as windows, doors, or corners that may require special attention when planning the layout. Ensure that siding panels are appropriately cut and fitted around these areas for a seamless appearance.
It is important to carefully plan and lay out your vinyl siding installation to achieve a professional-looking result. Taking these steps will help streamline the process and ensure that your siding panels are installed with precision.
Vinyl Siding Installation Tips suggest thoroughly evaluating the wall’s condition before proceeding with layout and planning.
Get ready to strip and corner your way to a flawless installation because this step is where the action begins!
Step 2: Installation of starter strips and corner posts
The process of installing starter strips and corner posts is an important step in the overall installation of vinyl siding. This step ensures proper alignment and stability before moving on to the next steps.
- Measure and cut the starter strips according to the length of the wall. These strips will be installed at the bottom of the wall and act as a base for attaching the first row of siding panels.
- Next, position and fasten the corner posts at each corner of the wall. The corner posts provide structural support and allow for a clean transition between different sides of the wall.
- Finally, secure the starter strips along the bottom edge of the wall, making sure they are level and properly aligned. This will create a solid foundation for attaching the siding panels in subsequent steps.
By following these 3 steps for installing starter strips and corner posts, you can ensure a strong and visually appealing finish to your vinyl siding installation project.
It is important to note that proper spacing and alignment are key factors in achieving a successful installation outcome. By following proper techniques and avoiding common mistakes, such as overdriving nails or placing them too close together, you can ensure an even appearance and long-lasting durability for your vinyl siding project.
When installing trim pieces and accessories, make sure to use appropriate tools and techniques to achieve a clean finish. Regular maintenance is also essential to keep your vinyl siding looking its best over time. Cleaning regularly with mild detergent and water, inspecting for any damage or loose pieces, and making prompt repairs when necessary will help prolong its lifespan.
Installing the siding panels: the moment of truth when your house transforms from ‘holy walls of chaos’ to ‘smooth criminal.’
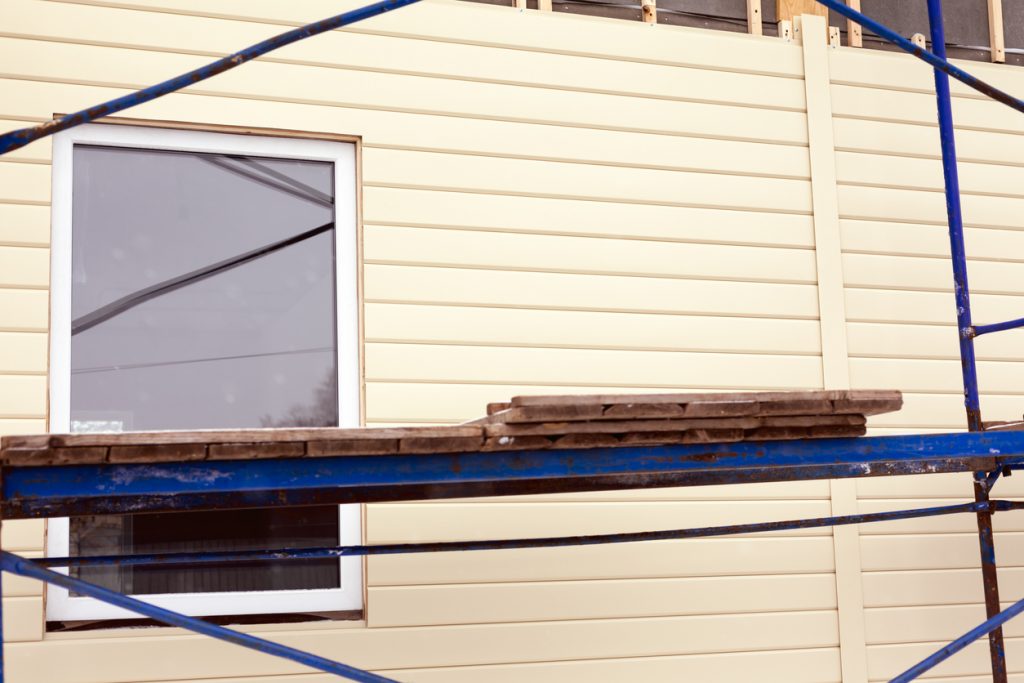
Step 3: Installing the siding panels
Installing the Vinyl Siding Panels is an essential step in the overall process of vinyl siding installation. It involves affixing the panels to the wall, ensuring proper alignment and spacing. This step gives your home a finished appearance and protects it from external elements.
Here is a simple 3-step guide for Step 3: Installing the siding panels:
- Prepare the area: Before installing the siding panels, make sure that the wall is clean and free from any dirt or debris. Remove any existing siding or trim, and repair any damaged areas on the wall surface.
- Start with starter strips: Install starter strips at the bottom of the wall to provide a foundation for the siding panels. These strips create a base for the panels and help ensure proper water drainage.
- Install the siding panels: Begin by attaching one end of a panel to a corner post or starter strip, making sure it is level and plumb. Continue installing panels horizontally, overlapping each panel’s top edge over the previous one’s bottom edge. Use appropriate nails or screws to secure each panel in place.
As you install each panel, ensure proper spacing between panels to allow for expansion and contraction due to temperature changes. Additionally, it is important to follow manufacturer instructions regarding specific installation guidelines for your vinyl siding product.
To further enhance the installation process, consider these suggestions:
- Take accurate measurements: Before beginning installation, measure your wall accurately. This will help determine how many panels are needed and ensure a seamless look without having to cut excess pieces later.
- Use quality materials: Invest in high-quality vinyl siding panels and accessories that are designed to withstand weather elements and maintain their appearance over time.
- Seek professional advice if needed: If you are unsure about any aspect of installing vinyl siding panels or encounter challenges during installation, consult with professionals who specialize in this field for guidance and support.
By following these steps and suggestions, you can successfully complete Step 3: Installing the siding panels and achieve a durable and visually appealing vinyl siding for your home.
If you’re not careful with your spacing and alignment, your vinyl siding might end up looking like a modern art installation gone wrong.
Ensuring proper spacing and alignment
To ensure the appropriate gaps and alignment during the installation of vinyl siding, it is crucial to follow specific steps. Here are the steps to ensure proper spacing and alignment:
- Take precise measurements before installing starter strips and corner posts.
- Use spacers or shims during panel installation to maintain consistent spacing.
- Regularly check for levelness both horizontally and vertically while aligning panels.
- Make adjustments as needed to avoid any gaps or overlapping between panels.
Following these suggestions will result in satisfactory spacing and alignment of vinyl siding panels, enhancing both visual appeal and functionality.
Installing vinyl siding is like a puzzle, but with the added challenge of avoiding mistakes – it’s like playing Jenga with your walls.
Avoiding common installation mistakes
Avoiding typical errors during the installation process is paramount to ensuring a successful outcome. By following these steps, you can sidestep common installation mistakes and achieve optimal results.
- Thoroughly inspect the wall condition and prepare the surface beforehand.
- Ensure proper spacing and alignment while installing the siding panels.
- Avoid rushing through the layout and planning phase; it is crucial for a smooth installation process.
- Pay attention to correct installation of starter strips and corner posts.
- Take care while installing trim pieces and accessories to maintain a polished look.
- Regular maintenance of vinyl siding will help prolong its lifespan and prevent future issues.
To further enhance your understanding of avoiding common installation mistakes, here’s an additional detail: consider consulting professional resources or seeking guidance from experienced installers. Their expertise can provide valuable insights into best practices and potential pitfalls to avoid. True History: In a notable incident, a homeowner overlooked the importance of proper spacing and alignment during vinyl siding installation. This led to uneven panel placement, resulting in an unsightly appearance. The subsequent rectification required extra time, effort, and expenses. By learning from such experiences, one can prioritize precision during installation, ultimately saving time and resources. Trim pieces and accessories are like the icing on the cake, except if you eat them, your cake won’t look as good.
Installing trim pieces and accessories
The process of installing trim pieces and accessories for vinyl siding involves adding finishing touches and enhancing the overall appearance of the installation. This includes attaching trim pieces and adding decorative accessories to complement the siding panels.
Here is a simple 3-step guide to installing trim pieces and accessories:
- Trim Installation: Begin by carefully measuring and cutting the trim pieces according to the desired dimensions. Ensure that they fit snugly against the siding panels and any corners or edges. Secure them in place using appropriate nails, screws, or adhesive recommended by the manufacturer.
- Corner Caps or Blocks: In order to add stability and protection to the corners of your siding, install corner caps or blocks. These act as reinforcements and prevent water infiltration. They can be attached using nails, screws, or adhesive.
- Decorative Accessories: To further enhance the visual appeal of your vinyl siding installation, consider adding decorative accessories such as shutters, window headers, or molding accents. These elements can be attached using appropriate methods recommended by their respective manufacturers.
It’s important to note that each manufacturer may have specific guidelines for installing trim pieces and accessories for their particular brand of vinyl siding. Always refer to their instructions for best results and ensure proper alignment with the existing vinyl panels.
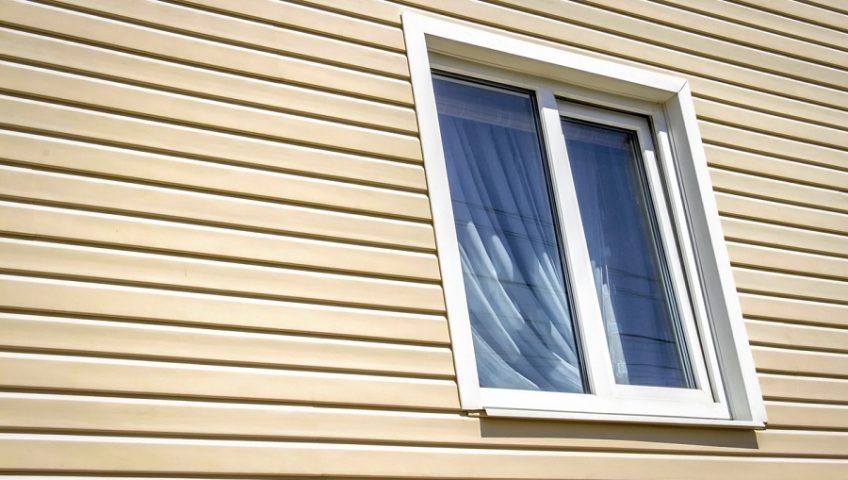
By following these steps, you can successfully install trim pieces and accessories that not only enhance the overall look but also provide added protection and durability to your vinyl siding installation.
Ensure you don’t miss out on giving your home a polished finish by properly installing trim pieces and accessorizing your vinyl siding with complementary elements. Take charge of transforming your house’s exterior into an inviting space that reflects your personal style.
Maintenance tips for vinyl siding
Vinyl siding requires regular maintenance to keep it looking its best and to extend its lifespan. By following these helpful tips, you can ensure that your vinyl siding remains in excellent condition for years to come.
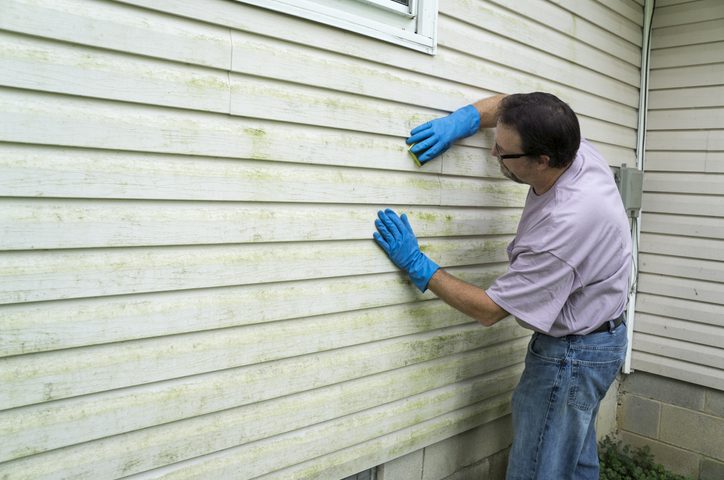
- Regular Cleaning: One of the most important maintenance tips for vinyl siding is to regularly clean it. Use a soft-bristle brush or a cloth with mild detergent and water to remove dirt, grime, and stains from the surface. Avoid using harsh chemicals or abrasive materials as they can damage the vinyl.
- Inspect for Damage: Periodically inspect your vinyl siding for any signs of damage such as cracks, chips, or loose panels. If you notice any issues, make sure to address them promptly. Repairing small damages can prevent them from escalating into bigger problems in the future.
- Prevent Mold and Mildew: Vinyl siding is susceptible to mold and mildew growth, especially in damp and humid areas. To prevent this, ensure proper ventilation around the siding by trimming trees or shrubs near the walls. Additionally, if you spot any signs of mold or mildew, clean it using a mixture of water and household bleach.
Overall, taking proactive steps in maintaining your vinyl siding can help protect its appearance and performance over time.
Don’t miss out on keeping your vinyl siding in top shape! Implement these maintenance tips today to preserve the beauty and durability of your home’s exterior.
Five Facts About Vinyl Siding Installation Tips:
- ✅ Installed panels must be able to move freely from side to side, so do not nail too tightly.
- ✅ When installing a siding panel, push up from the bottom until the lock is fully engaged with the piece below it.
- ✅ Perforate the cut edge of the top of the wall using a snap-lock punch every 8″ to allow for expansion and contractio
- ✅ Leave a clearance of 1/4″ at all openings and accessory channel stops to allow for normal expansion and contraction.
- ✅ Do not caulk the space between the panels and the J-channel, outside and inside corners, and any other trims. Also, do not caulk overlapping joints between siding panels.
FAQs about Vinyl Siding Installation Tips
Q1: How should I install vinyl siding panels?
A1: When installing vinyl siding panels, make sure they move freely from side to side and avoid nailing them too tightly. Leave a minimum of 1/32″ space between the back of the head and the nailing hem and space fasteners 12″ – 16″ apart on center.
Q2: What is the proper technique for installing a siding panel?
A2: To install a siding panel properly, push up from the bottom until the lock is fully engaged with the piece below it. Without stretching the panel, reach up and fasten it into place.
Q3: How should I finish the top of the wall when installing vinyl siding?
A3: When finishing the top of the wall, use a snap-lock punch to perforate the cut edge approximately every 8″. Ensure that the “tabs” face outward.
Q4: What clearance should I leave at openings and accessory channel stops during vinyl siding installation?
A4: Leave a 1/4″ clearance at all openings and accessory channel stops. This allows for normal expansion and contraction. If installing in temperatures below 40°F, leave 3/8″ clearance.
Q5: Should I caulk the space between the panels and trims during vinyl siding installation?
A5: No, it is important NOT to caulk the space between the panels and the J-channel, outside and inside corners, and any other trims. Also, avoid caulking overlapping joints between siding panels.
Q6: What should I avoid during vinyl siding installation to prevent panel damage and buckling?
A6: Never nail through the face of the siding. Instead, center fasteners in nail slots. Nailing at an angle can also distort siding panels and cause buckling. Apply slight upward pressure until the lock is fully engaged, and avoid stretching panels.